- Log into your Gmail account.
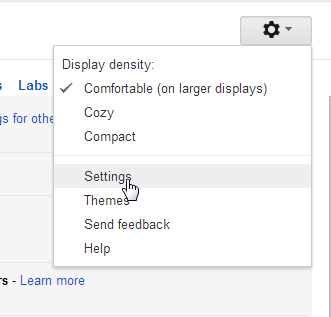
- Go to the Gear at the top right and select Settings.

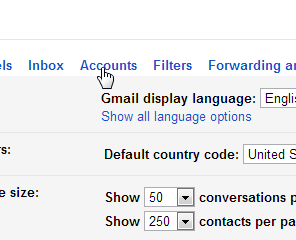
- Click the Accounts tab.

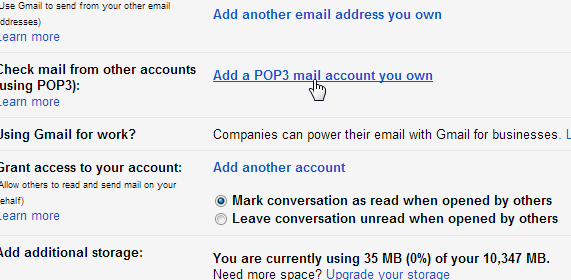
- Next to “Check mail from other accounts (using POP3),” click Add a POP3 mail account you own.

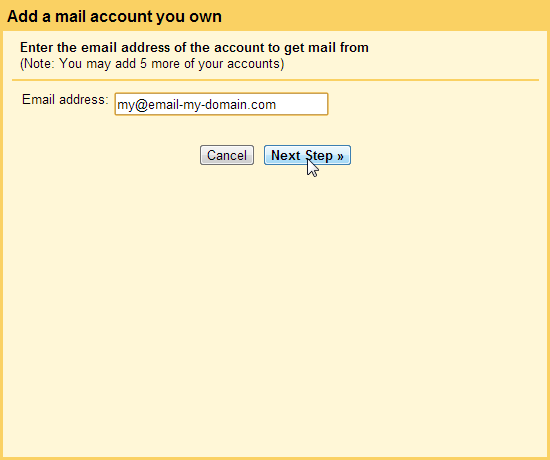
- Enter your domain’s email address and click Next Step.
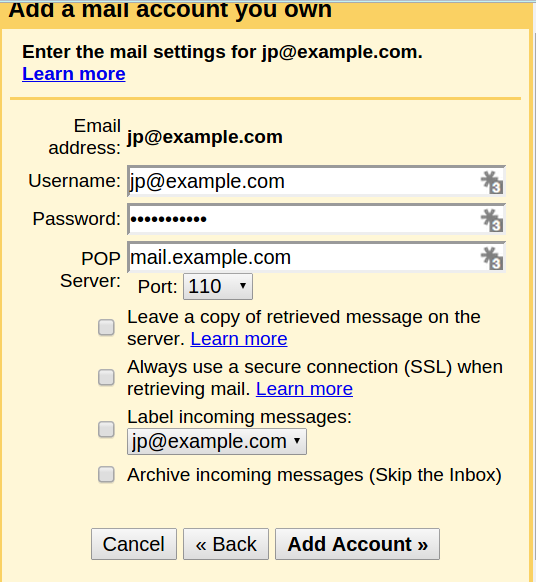
- Enter your POP3 information for your domains email address in the form.Click Add Account.

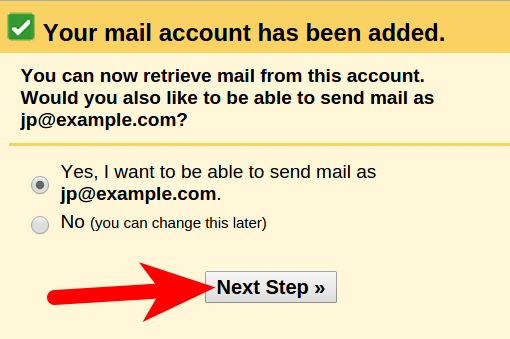
- You will see a message stating Your mail account has been added. You can set the email to send as well.
Note! If you do not want to send through Gmail, click the No radio button. You don’t need to follow the next steps.
If you want to send through Gmail, select Yes and Click Next Step.

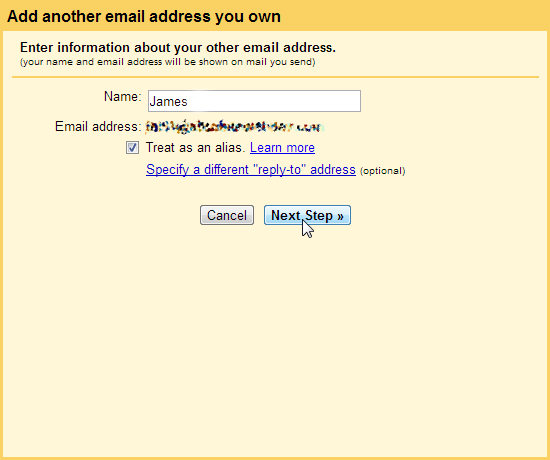
- Enter your Name.Click Next Step.

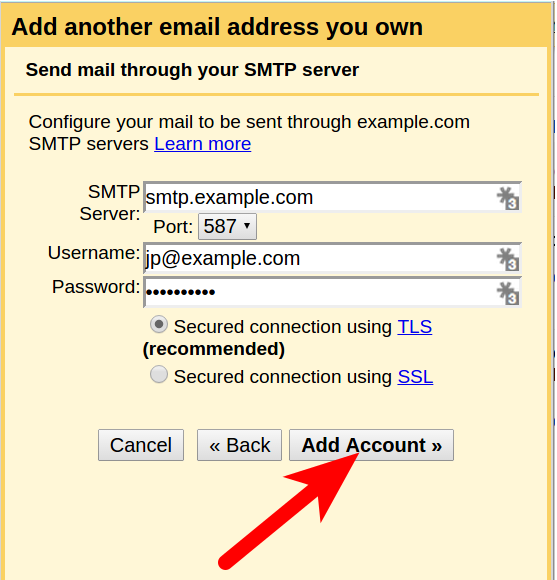
- On the Send mail through your SMTP server page, fill in your SMTP Server, Username (full email address), and Email Password. Then, click Add Account.

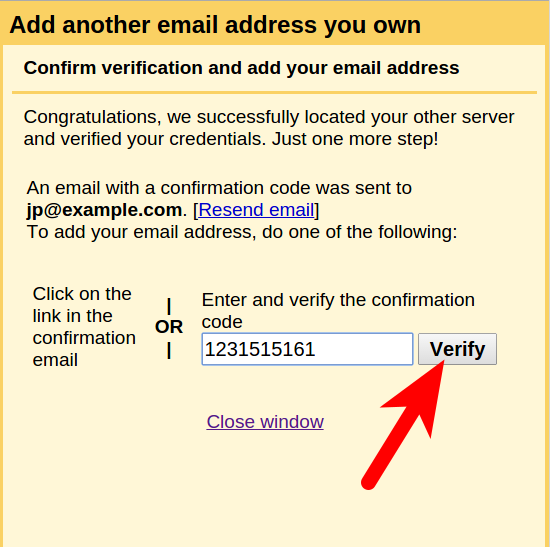
- Now, Gmail will email a verification code to the address you just added. Check your domains email for a message Gmail sent you. Click the link in the email, or Enter the code into the text box and click Verify.

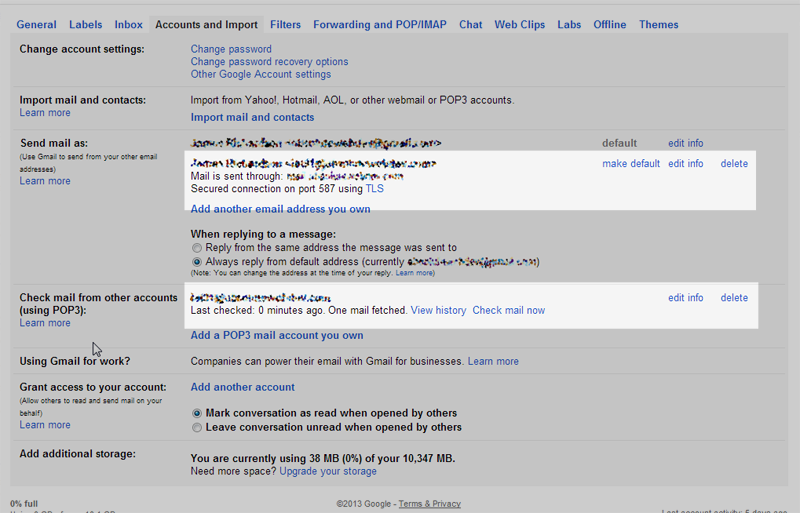
Now you will see your Domains email address in the Send Email As and the Check mail from other accounts section.


